
JMBricklayer 70154 Mechanical Parrot Review

It's May 2024 and we are back with another review. And it's a time for a look at one of the latest JMBricklayer sets!
If you don't already know, JMBricklayer stands for Joy Makes Brilliance, an up and coming Lego compatible building block distributor and manufacturer.
They have authorization from the manufacturers of building block sets for
their global online distribution, with channels on Amazon US, CA, UK, DE,
including their official worldwide online store at JMBricklayer.com.

Also starting in the month of May, check out JMBricklayer's new exclusive
event -
Brick It Happen on Facebook, where you can submit your ideas (text/image/video/sketch/etc) and get a
chance to make it happen with real bricks! Ok, let's get into
the review:
Today's Set Review
So the Mechanical Parrot 70154 set is another in JMBricklayer's series of half
mechanized animals which is part of their Fantastic Ideas theme.
Basically, the building block sets are constructed so that half of the
display looks like a real animal and the other side is a mechanical or robot
like version of the creature. Usually the mechanized side are adorned
with shiny parts and gears and sometimes come with a unique lighting effect
which is the case with the mechanical parrot.
- Brand: JMBricklayer
- Set and Number: Mechanical Parrot 70154
- Theme: Fantastic Ideas
- Piece Count: 688+ pieces
- Age Rating: 14+
- Numbered Bags: No
- Stickers: No
- Printed Parts: No
- Minifigures: No
- Lighting Effect: Yes
- Extra pieces: A ton!
More Details and Special Pricing from JMBricklayer
Note: The Amazon US store discount codes are valid from May 15th to May 21st, so don’t miss out!
| Store | Price | Discount Code | Discount |
| Amazon US | $24.99 | E52MA2SZ | 15% |
| JMB Site (for worldwide buyers) | $24.99 | JMBVIP15% | 15% |
For Amazon US, the coupon code JMBHAR15 for US Amazon applies only to the Mechanical Parrot 70154 and is valid for one month, offering a 15% discount.
Unboxing
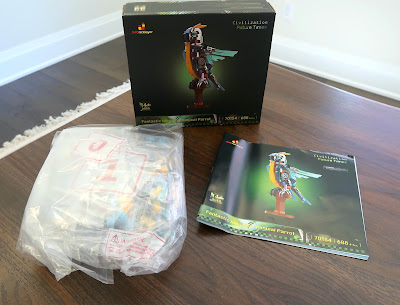


These are the parts from numbered bag Zero.

And these are the parts from numbered bag One. With some extra pieces
that are separate. A closer inspection of the bagged pieces reveals a
lot of small 1x1 type parts, which explains the high piece count of over 688
pieces.


Steps 127 through 139 builds the wooden perch for the parrot. The technic pins from the legs will go into the two circular slots in the perch.


Those mechanical claws are awesome looking.


Rear view.


I turned off the room lights so you can see the lighting effect of the
mechanical parrot. I think a great enhancement would be to somehow
illuminate the eye of the mechanical parrot as well. This is a unique effect not found in standard Lego sets.

Final Thoughts
This was a fun little set that took me a good part of an afternoon to
build. I think it might have even gone a bit faster if the build was broken down into sections and used more than 0 and 1 to number the bags. This might take some users new to Lego style bricks to get used to. Overall part quality and clutch was decent, although I have no idea why there were so many extra pieces.
The mechanical side neon light tube was easy to install and operated with knob. Apparently you can adjust the three tail feathers which I only found out about later. One issue I had was I could only install the wings in an upright position. Trying to lower the wing caused the ball joint to pop out for me.
I really liked how the bird side of the parrot turned
out. It got me thinking about how to improve this set. I
think for these types of half animal, half mecha sets, the
designer/manufacturer should also include the requisite pieces to build
the entire animal in it's natural form. With that you could buy one set and build it two different ways.
While I do like the uniqueness of the mechanical robot parts, I think
just building the parrot as a model of a bird would make a beautiful
display. And then they could do a whole series of different birds
which I would definitely enjoy.
The mechanical parrot
displays very nicely and for the preceding reasons, I will give it a score of 4.1 out of 5.
If you love these half animal, half mecha style sets, please check out
some of my other JMBricklayer reviews below:
More about the JMBricklayer brand
You will find that all JMBricklayer sets are tax free and always shipped in
sturdy premium boxes fulfilled quickly by Amazon, directly from their US, CA,
UK & DE warehouses. They offer free replacements for missing or broken
parts. Their Trustpilot page (https://www.trustpilot.com/review/www.jmbricklayer.com) has a solid 4.5+ rating.
Please use my code "itsnotlego15%" to save on your purchases at the JMBricklayer website (non sale items).
Dont forget to check out the JMBricklayer Facebook and Instagram pages to
participate in their promotions and monthly contests where you can win free
sets and get exclusive discount codes up to 60% off.
#bricktoyreviews #jmbricklayer