JMBricklayer 70005 Astronaut Panda Review
Hey brick toy fans! I've got another cool set to show you today courtesy
of JMBricklayer! It's the new Fantastic Idea Space Astronaut Panda, part
Astro Mecha and part pudgy Panda Bear! It's another set in the
expansive series of
JMBricklayer mecha robot sets.
Here's all the details:
-
Brand:
JMBricklayer
- Theme: Fantastic Ideas
- Name and Number: Space Astronaut Panda 70005
- Piece Count: 829 pcs
- Age Rating: 14+
- Stickers: Yes
- Printed Parts: Yes
- Minifigures: No
- Numbered Bags: Yes
Where to get it
- Pricing: $54.99 USD
- Shipping: Free Worldwide
Unboxing
Every JMBricklayer set comes packaged nicely in a sturdy box showing what the
set looks like.
I thought it was pretty cute that the backside of the box, shows you the
backside of the space bear too!
Even the instruction manual repeats the front and back images of the box art.
There are 61 pages in the instruction booklet. Each page packs a lot of
instruction, so you have to be careful that you don't accidentally miss a step
when you are following the instructions.
There's a neat page that describes all the features of the Space Panda set.
There are 4 different steps involved with building the Space Panda mecha,
which we will review later.
Here's what we found in the box of parts. A spacesuit visor separately
packaged to prevent scratches.
A moulded angry panda face.
This orange flex tube was stuck at the bottom of the box and I almost threw it
out by mistake. Make sure you empty out the contents of your box and
make sure you don't leave anything behind.
There are not one, but two sticker sheets. That's a lot of
stickers.
Here are all of the parts for the Space Panda in their respective numbered
bags. As mentioned earlier, there are 4 sections in the manual and
therefore there are bags marked 1 thru 4. Out of the box, you will get 6
numbered bags as follows: section 1: 2 bags, section 2: 1 bags, section 3: 1
bag, and section 4: 2 bags. You will find that some of the bags will
actually have other smaller bags of parts in them as well.
Let's Build!
Section 1, consisting of 59 steps, starts on page 2 of the manual.
After opening all the bags for section 1, we find a good selection of
printed parts amongst the other pieces.
Following the instructions we are building the spacesuit of the space
panda.
My initial impression of the parts used was that the brick's finishing and
clutch were excellent. I was impressed that the brick parts, especially
the black pieces, were smooth and not scuffed. Some of the older alternate
brand brick sets use bricks that look like they've been through the wringer, but
these bricks were not those.
Clutch was great and no matter how I handled the torso, nothing fell off.
Section 2, starts on page 15 and adds the legs, arms, hands and back to the
torso.
Pretty straightforward building so far.
Section 3, starts on age 28 and attaches the helmet and panda face to the
spacesuit.
The construction of the Space helmet for the Panda was reminscent of the
technique used in the other JMBricklayer Mechanical Astronauts I built.
Ok, let's attach the helmet to the spacesuit. This is the front side.
And this is the backside.
Angry Panda face attached.
Ok, on to the final step #4 which starts on page 44 of the manual.
First we build the what I think is the life support unit. The blue
bricks are supposed to be the battery I think. It probably looks a lot
better with the sticker but I didn't put it on.
Now we attach the life support unit to the spacesuit.
The helmet visor was supposed to be attached in section 3, but I didn't want
to accidentally scratch it, so I left it off until now.
Here's the base and the feet which are firmly attached to it. The pins
from the legs get inserted into the holes in the feet.
We had a few spare parts left over after finishing the Space Panda.
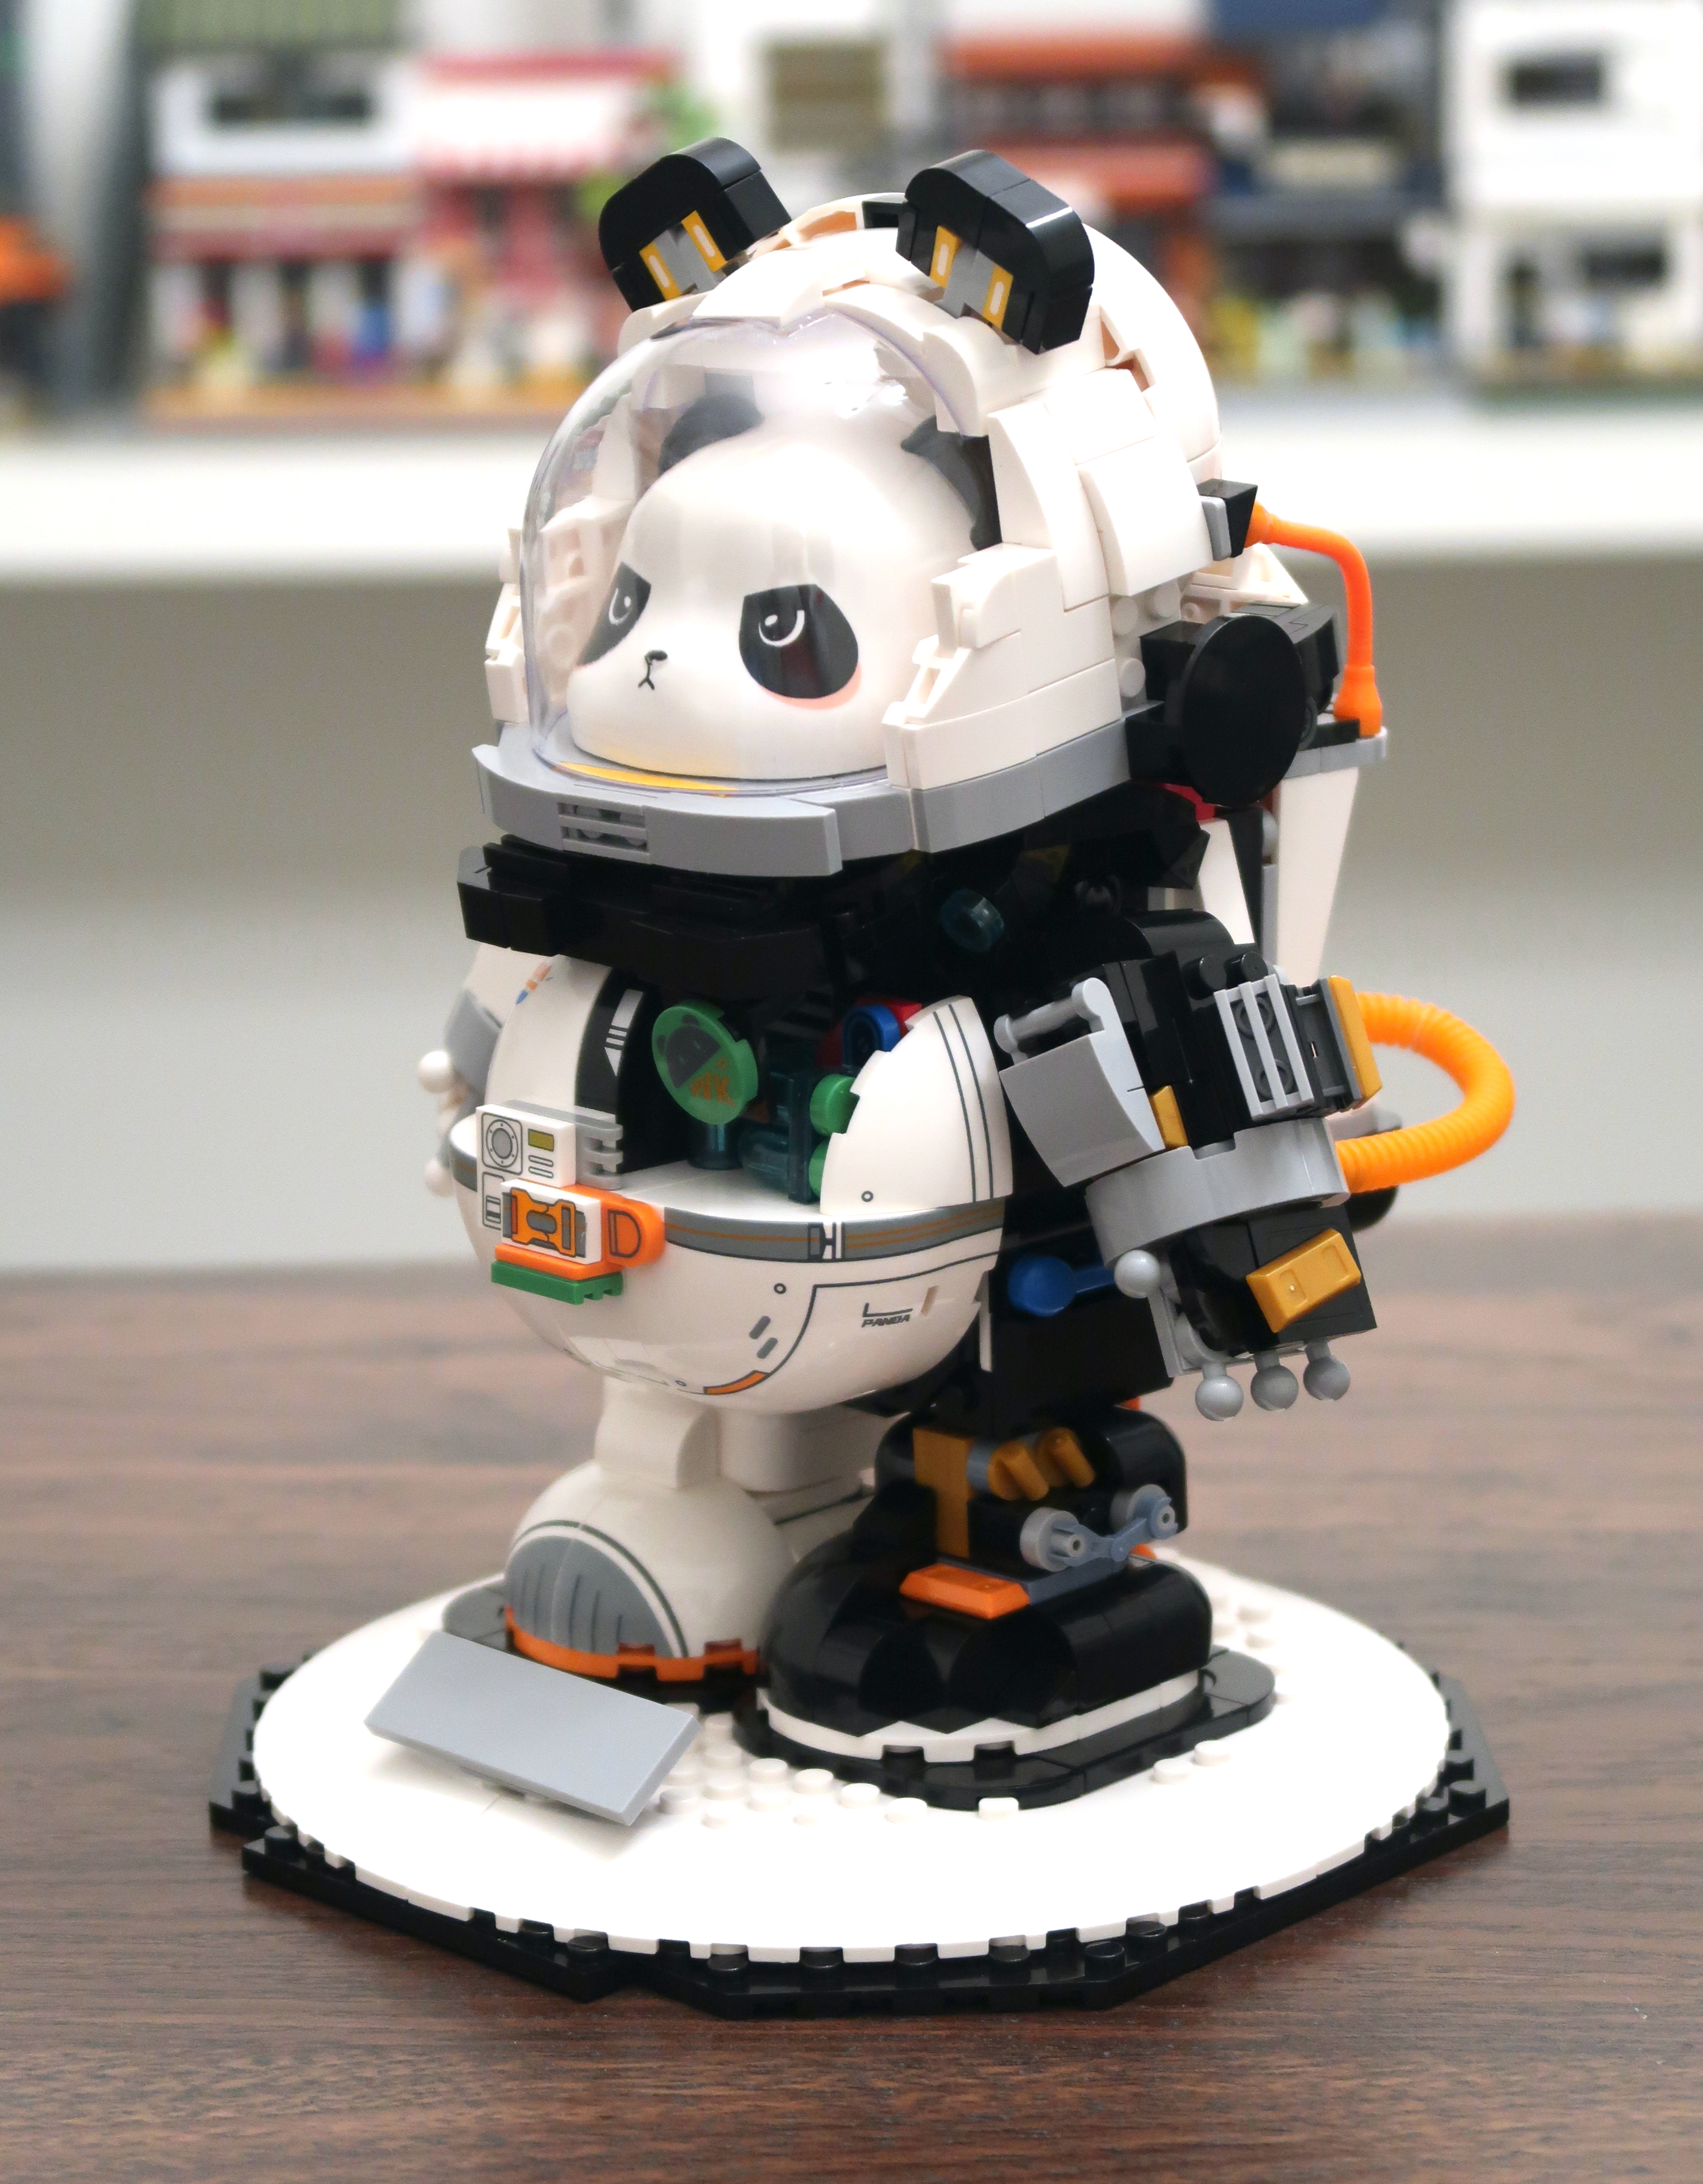
And here is the adorable Space Astronaut Panda!
He looks quite pudgy and the printed parts adds a lot of colourful details
to the spacesuit. They don't tell you in the manual that Space Panda's
arms can be raised and lowered. You can rotate hands, or should I say
paws, as well.
Even without the provided stickers, the Space Panda looks pretty good.
The life support unit has a tendency to make the Space Panda lean
back. Here I have adjusted his stance so that he looks like he's
standing straight up.
Yeah, in hindsight, maybe I should have put some of the stickers on inside the
life support unit.
Thought you might like to see the Space Astronaut Panda and the
Space Astronaut Mecha
together! Which one would you get? Panda? Mecha Astronaut, or
both? They both make great display pieces for your desk or shelf.
Please use my code "itsnotlego15%" to save on your purchases at the JMBricklayer website (non sale items).
Anyways, that's my blog post for today, hope you have enjoyed this review of
the JMBricklayer Space Astronaut Panda! Bye!
#bricktoyreviews #jmbricklayer