JMBricklayer 70007 Fantastic Idea Cloud Surfing Dragon Review
Hey brick fans!
Today I will be unboxing, building and reviewing the JMBricklayer 70007 Fantastic Idea Cloud Surfing Dragon set. JMBricklayer was kind enough to provide the set for today's review. All opinions are my own.
Lego-compatible sets just got a whole lot more legendary with this vibrant
green and yellow dragon that captures both the imagination and the skies! This
set features an intricate dragon, arms extended, with claws reaching towards a
luminous moon-shaped globe. It sits perched on a mountain top surrounded
by wispy clouds. Both the dragon's eyes and the moonlight up, adding an
extra layer of magic. The eyes glow with an intense light, giving the dragon a
fierce, almost lifelike look, while the soft glow of the moon creates a
peaceful, ambient effect.
Set Description
Brand: JMBricklayer
Set Name and Number: Fantastic Idea Cloud Surfing Dragon 70007
Piece count: 1364 pieces
Stickers: No
Printed parts: No
Minifigures: No
Numbered bags: Yes ✅
Lighting kit included: Yes ✅
Price: $69.99 USD
>>>. JMB global online store:
Fantastic Idea Cloud Surfing Dragon
15% off code: VIPLEGS15 (valid for all non-sale items within the store, valid for a very long time)
Limited time only: Exclusively at JMBricklayer.com, orders actually paid $69.99 or more will receive a free gift (includes US, UK, DE, and CA warehouses).
>>> Amazon:
https://amz.run/70007
15% discount code: VIPBAT15 (valid for one month)
Unboxing
All JMBricklayer building block sets come in a sturdy box. This one which
features The Cloud Surfing Dragon set giving off s a nice turquoise glow.
Goodies we get inside the box include a colourful manual, several numbered bags
of parts, a box with a picture of the moon on it, some metal rods and a black
pouch containing the lighting kit.
This bags has no numbering, but I think it will be used for the base.
All of the remaining bags are numbered and correspond to the steps in the
manual. Step 1 uses 5 bags of parts (plus the un-numbered bag).
There are three bags for step 2.
Four bags for step 3.
and 5 bags for step 4.
There are two long rods which are flexible metal with a black plastic coating.
And a medium length gray tube.
Here's the moon globe, I can't tell if it's made of hard plastic or a glass
composite material.
Lighting Kit
This set also includes a lighting kit.
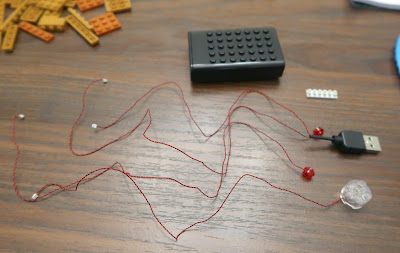
The lighting components include a battery box which uses 3 AA batteries (not
included). A 6 port board to connect the lights, a USB plug, two red
lights and one cylinder light.
It's a good idea to test all the lighting before you incorporate it into the
building block set.
Don't worry, if you are new to using light kits. The JMBricklayer manual
provides detailed instructions on how to connect the wires and lighting.
Building the Cloud Surfing Dragon set
As per the manual, the Cloud Surfing Dragon is broken down into 4 steps. Use the
bags of parts that correspond to each step.
Step 1 builds the base and the mountain top and some supporting rods.
I gathered all the parts for step 1.
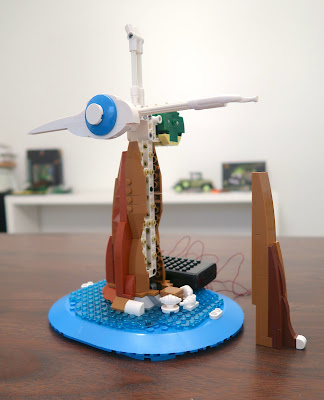
Here's the base and the technic structure that will be embedded inside the
mountain top. The battery pack just sits off to the side. I would
have liked it if the base was raised so that the battery pack could be hidden
inside instead of it just sitting there.
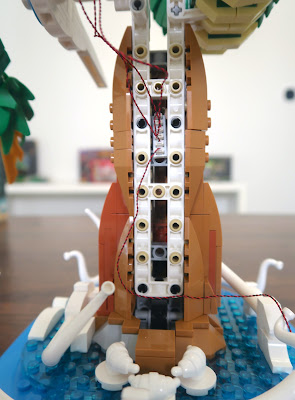
You assemble 4 sides of the mountain but only attach 3 for now. All the
white bricks are supposed to represent clouds methinks.
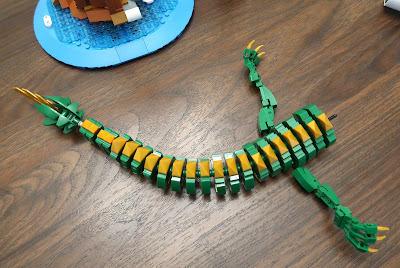
Moving on to step 2, we will build the dragon tail and lower body.
These are the parts for step 2 including the metal rod which is bendable.
The dragon body is segmented and building each segment gets kind of
repetitive. Brick clutch is so-so as every time I handled the body parts
would fall off. And the arms will fall off just by looking at
them.
More of the same for step 3, this time we build the upper torso.
Pretty much the same as step 2 in terms of parts. I forgot to show the
second rod used to join all the segments together.
Here we have completed step 3. More segments and loose parts and another
pair of loose arms to deal with.
So far the build has been tedious but quick. Step 4 proved to be a lot
more challenging.
Here's all the parts needed for step 4. We will build the dragon head
and twist the body around the structure that is the mountain top.
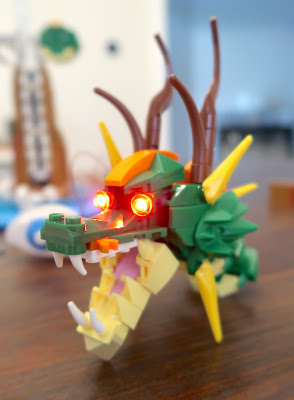
The assembled head looks pretty fierce with those glowing red eyes.
Here's the (not so) fun part of the build. You have to twist the body so
that it wraps around and connects to the technic structure in just the right
way. Even the manual tells you this part is going to be tricky.
Trying to manhandle the body to contort it properly resulted in so many pieces
falling off. I wonder if it might have been easier to change the
instructions to attach the core bricks to the rod first, twist as
required, and then finally, add all of the surface parts to it.
I couldn't get the bone parts and grey rods to connect as per the
manual, so I gave up.
These are the parts that I ended up not using, because they don't fit like the
manual shows.
The connection board is hidden inside the mountain structure. Try not to
pinch the wires when you place the cover over it.
Another challenge I encountered was that the dragon head was too heavy for
the connection point. Because the clutch was weak, the head would fall
off whenever I tried to attach it. Very frustrating.
I'm not sure if maybe I didn't follow the instructions correctly, but after
several attempts, I changed the neck design and used my own parts so that
the head would stay up. I ended up using some technic bricks and
various 2x2, 2x3 plates to fasten the loose neck. Then I re-applied the
surface parts as best as possible.
Here is the result of my neck fixes. I think me and dragon head
building blocks don't get along, because I had similar issues with the
JMBricklayer Legendary Dragon Head 70105 set. Again the weight of the head exceeded the clutch capabilities of
the design. At least in this set I was able to rectify the issues.
Despite all of the challenges, the Cloud Surfing Dragon set looks pretty good.
Here's a few more views.
I probably could have done a better job hiding the light wires.
The Dragon and the full Moon.
You have to turn down the room lights to really appreciate the display.
Final Thoughts
This 1364 piece set started out easy and mundane, and then it turned into a
real challenge. Issues I encountered during the twisting of the body included
parts of the body falling off and the arms and legs falling off. The
weight of the dragon head also needs to be addressed. In hindsight, this
is another one of the those sets where the design needs more thought and needs
to be more durable for occasional or inexperienced brick builders and
enthusiasts.
I built the Cloud Surfing Dragon over the course of a few days with steps 1 and 2 on the first day, step 3 on the second day, and step 4 and subsesquent fixes on the third day.
If you don't mind a challenging building block set, you should enjoy the
JMBricklayer Cloud Surfing Dragon set, which looks great as a display piece. The main feature of
this set is the lighting of the dragon eyes and the glowing moon orb.
If you are a fan of mystical dragons, you're going to love this building
block set.
Hope you have found this review helpful! Bye for now!


