
JMBricklayer 70105 Legendary Dragon Head Review

Are you bored by all the latest building block sets that you can put together
with your eyes closed? Do you yearn for a challenging set that forces
you to stimulate your brain, to come up with novel solutions to an unforeseen
problem? If your answer is yes, please read on!
Hey brick fans, today we will be looking at the
JMBricklayer Legendary Dragon Head Building Block set, number 70105. This fantastic looking set is sure to capture
your attention with it's life-like 3D head of an angry dragon. However
it is not without peril, as you will soon see in our building experience
below!

Today's set is brought to you by JMBricklayer, one of the latest up and coming
building block brands to hit the market. You can find this stimulating
set and more in the
JMBricklayer store
and also on
Amazon.
For any non discounted items in the JMBricklayer store, feel free to use my code
itsnotlego15% to help you to save an
extra 15% off your purchases.
Brand: JMBricklayer
Set: 70105 Dragon Head
Piece Count: 2713 pcs
Numbered Bags: Yes
Extra Pieces: Yes
Missing Pieces: No
Minifigures: No
Age Rating: 14+
Unboxing

As with all JMBricklayer sets I've received so far, they all come with the box
intact. The box provides information such as the set name and number,
the piece count and the age rating. I found a total of 37 numbered bags
in the box going from number 1 thru 13. Each of the numbers on the bags
corresponds to the steps found in the instructions.


Build Progression
Pictured below are the milestones of completing each of the 13 steps to
build the dragon head.

The dragon head is built to be displayed on an elliptical shaped
stand. The black bricks are your standard alternative bricks,
with a mildly scuffed finish. There are four appendages attached to
the stand which I find totally un-necessary.

There's an interesting use of some brown and gold details on the
stand. It would have been great if more metallic shades of brick were
used in the head too.

Pictured above is the central column which the dragon head will be
constructed around. So far the structure is solid, except there is a
slight wobble where the stem meets the base.

In step 4, we can see the sub-structure of the head taking shape, including
the nose and lower jaw, which is moveable.

In step 5, we begin the process of adding surface details to the dragon's
lower jaw. and neck.


Cladding for the nose and eyes happen in this step. Setting the
eyebrows in place is a rather tricky affair, since they are only
attached by a single stud above the eye. This proved to be a
weak spot as the eyebrows are prone to fall off when handling the dragon
head. This part of the design requires further improvement in my
opinion.

Step 10 sees the second pair of horns attached to the head. These
horns were problematic to attach and stay attached. The bend in the
horns is a rather weak connection. Any handling or moving of the head would
result in them falling off. I think it is both a clutch and design
issue. I was subsequently able to find a solution that had the horns
stay attached. (more details later).

In steps 11 and 12, the largest and heaviest of the dragon horns are to be
attached. Their weight puts a significant strain on the head which
is already compounded by all of the other attachments to the head.

At step 12, the weight of the final horn proved to be too much and the
upper part of the head came away from the central stem. The brick
clutch could not hold it in place and several other pieces fell off when
the upper part of the head came crashing down onto the table. I
reconstructed how the head should have looked with both horns attached,
and at this point was wondering if I could finish the dragon head at all.
Fixing the Dragon Head

After examining the clutch failure, it was determined that the top section
of the head should be fastened to the stem. Luckily, the stem comprises
technic bricks, which have holes in them. Therefore, modifications to the
set design are necessary to incorporate the required alterations that will
enable the upper head to connect to the stem.

I reviewed the instructions to see where I could create a connection point
from the upper head to the stem. On step 169 in the first instruction
book, I've identified the brick that needs to be replaced with new technic
bricks to which I could secure it to the bricks below.

Here are the handful of parts needed. The colour of the parts is
unimportant. The two rounded technic plates will serve as
braces. Two of the existing gray technic nuts will be replaced by
the thinner yellow nuts on the lower part of the stem.
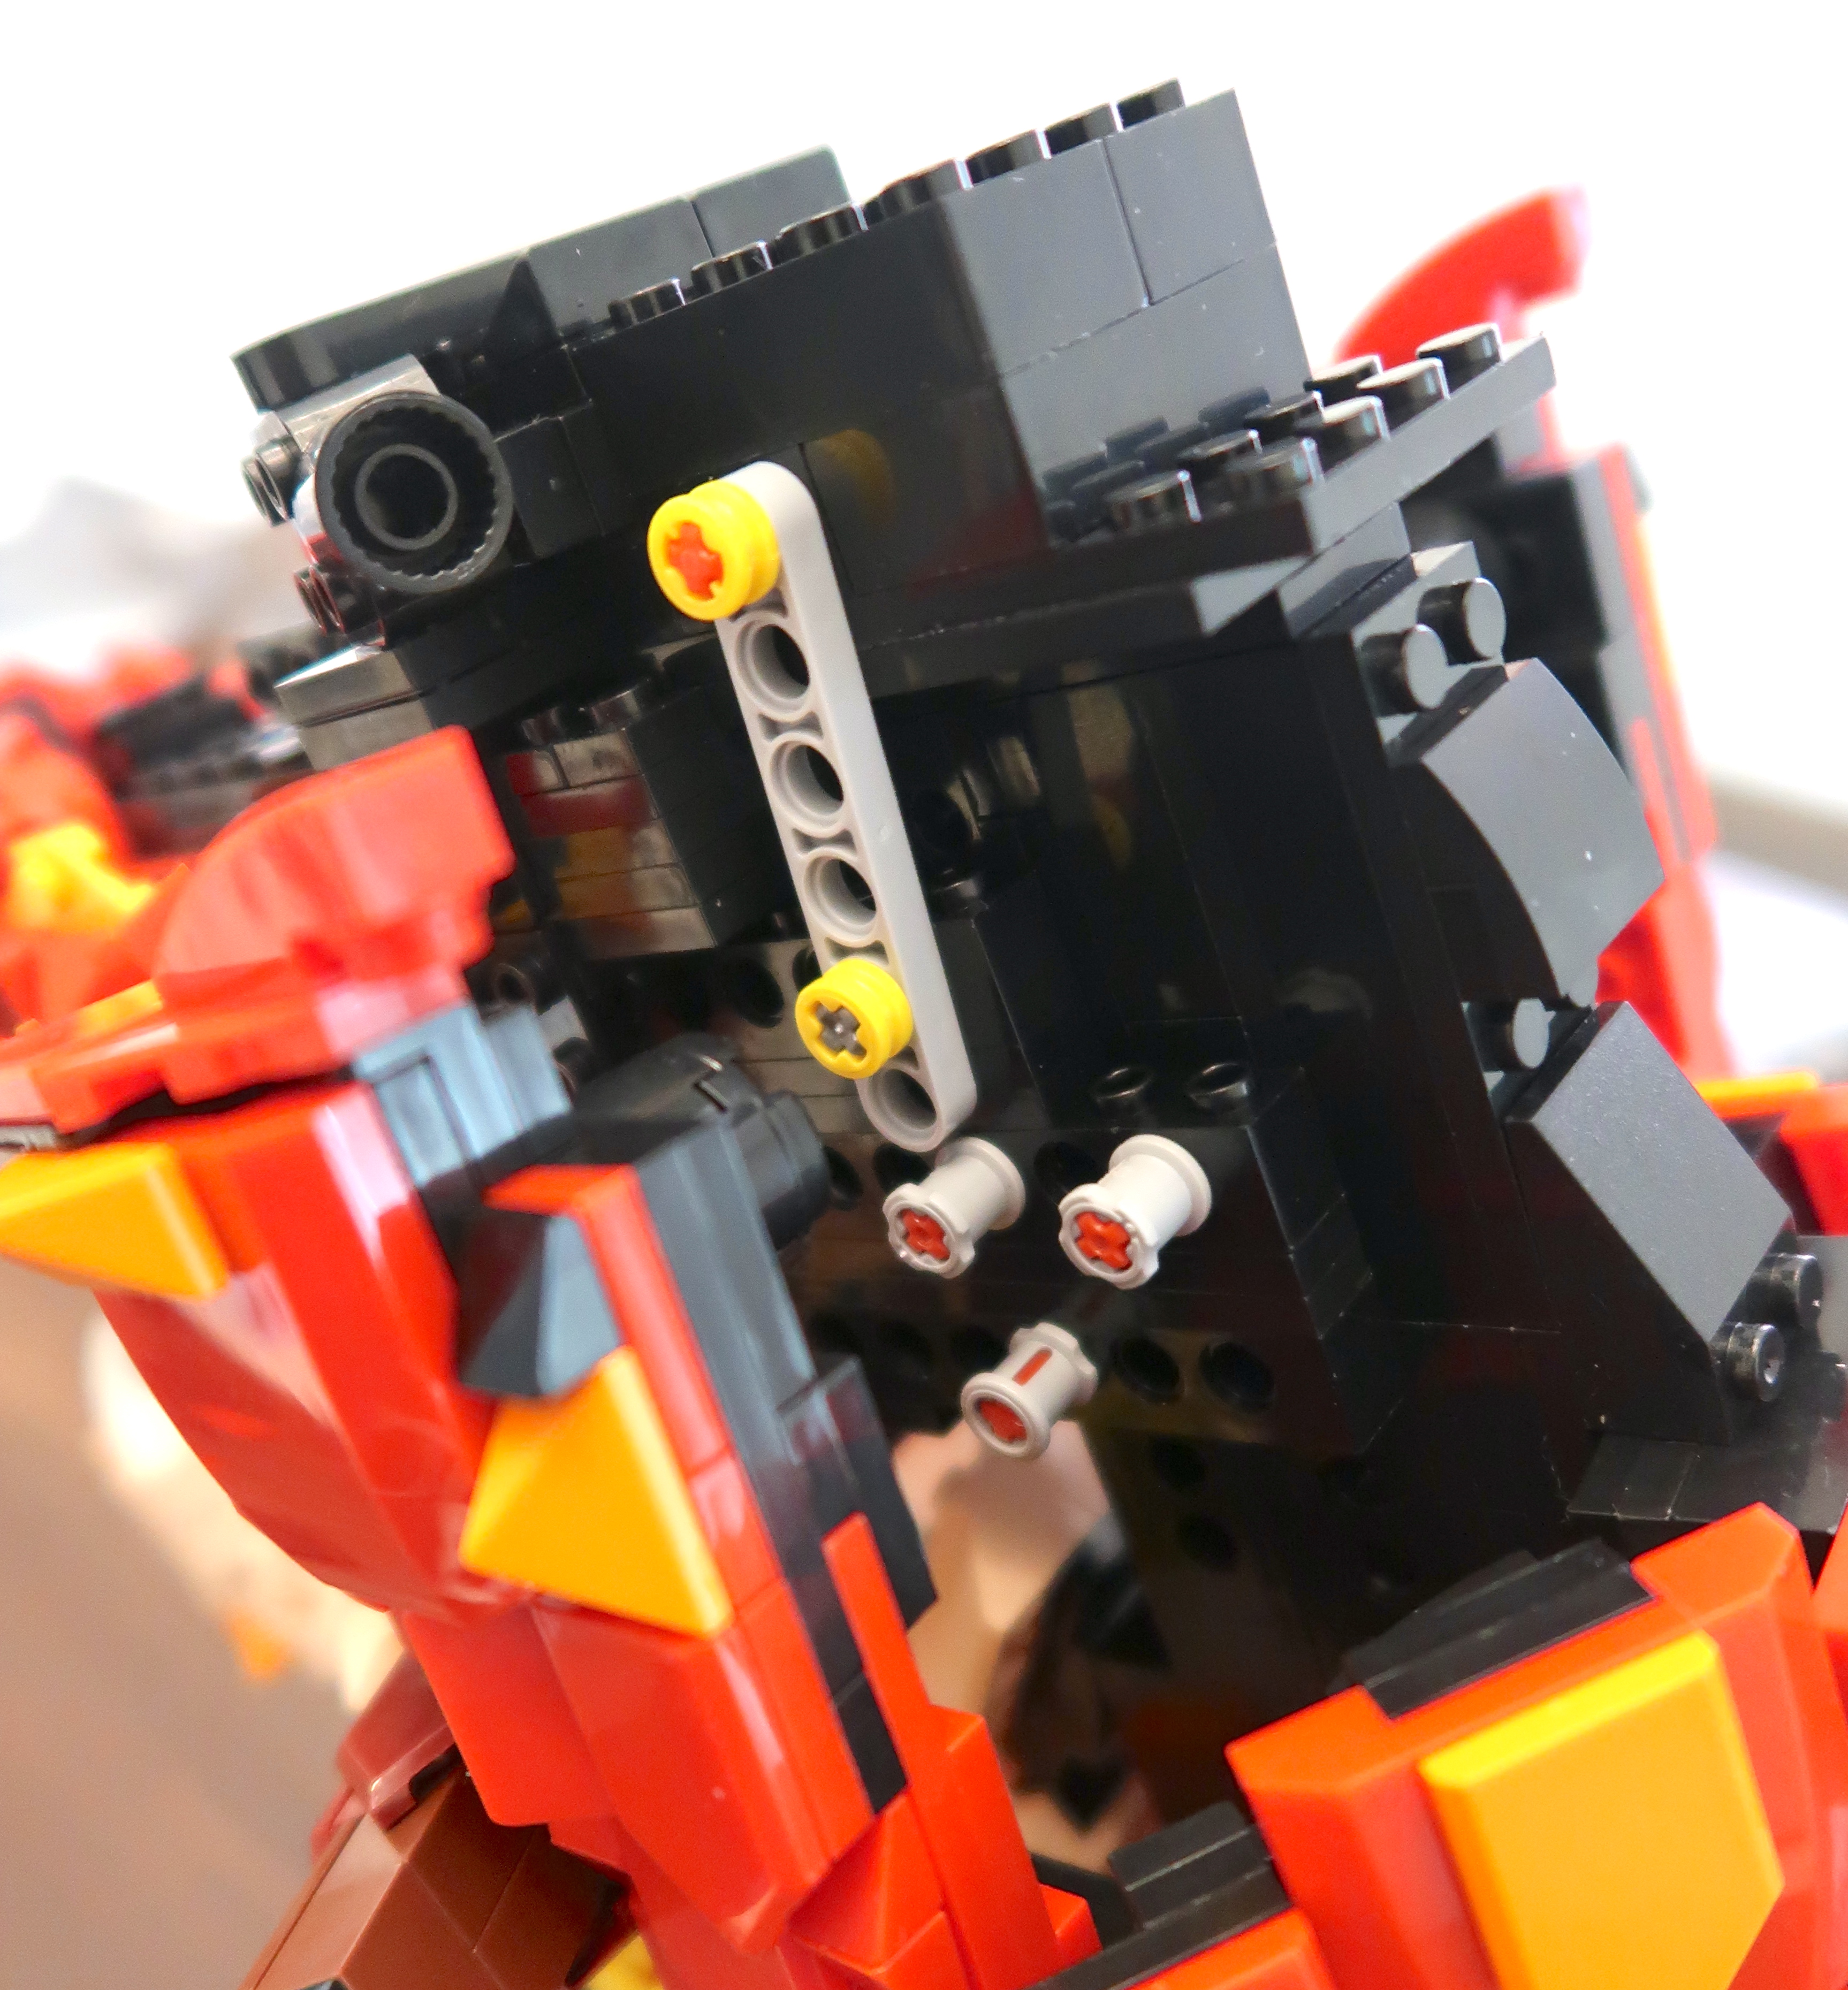

While I was at it, I decided to address the clutch of the largest
horns. I surmised that they were inset too much and were chafing the
other adjacent pieces. I added a 2x4 brick on either side.


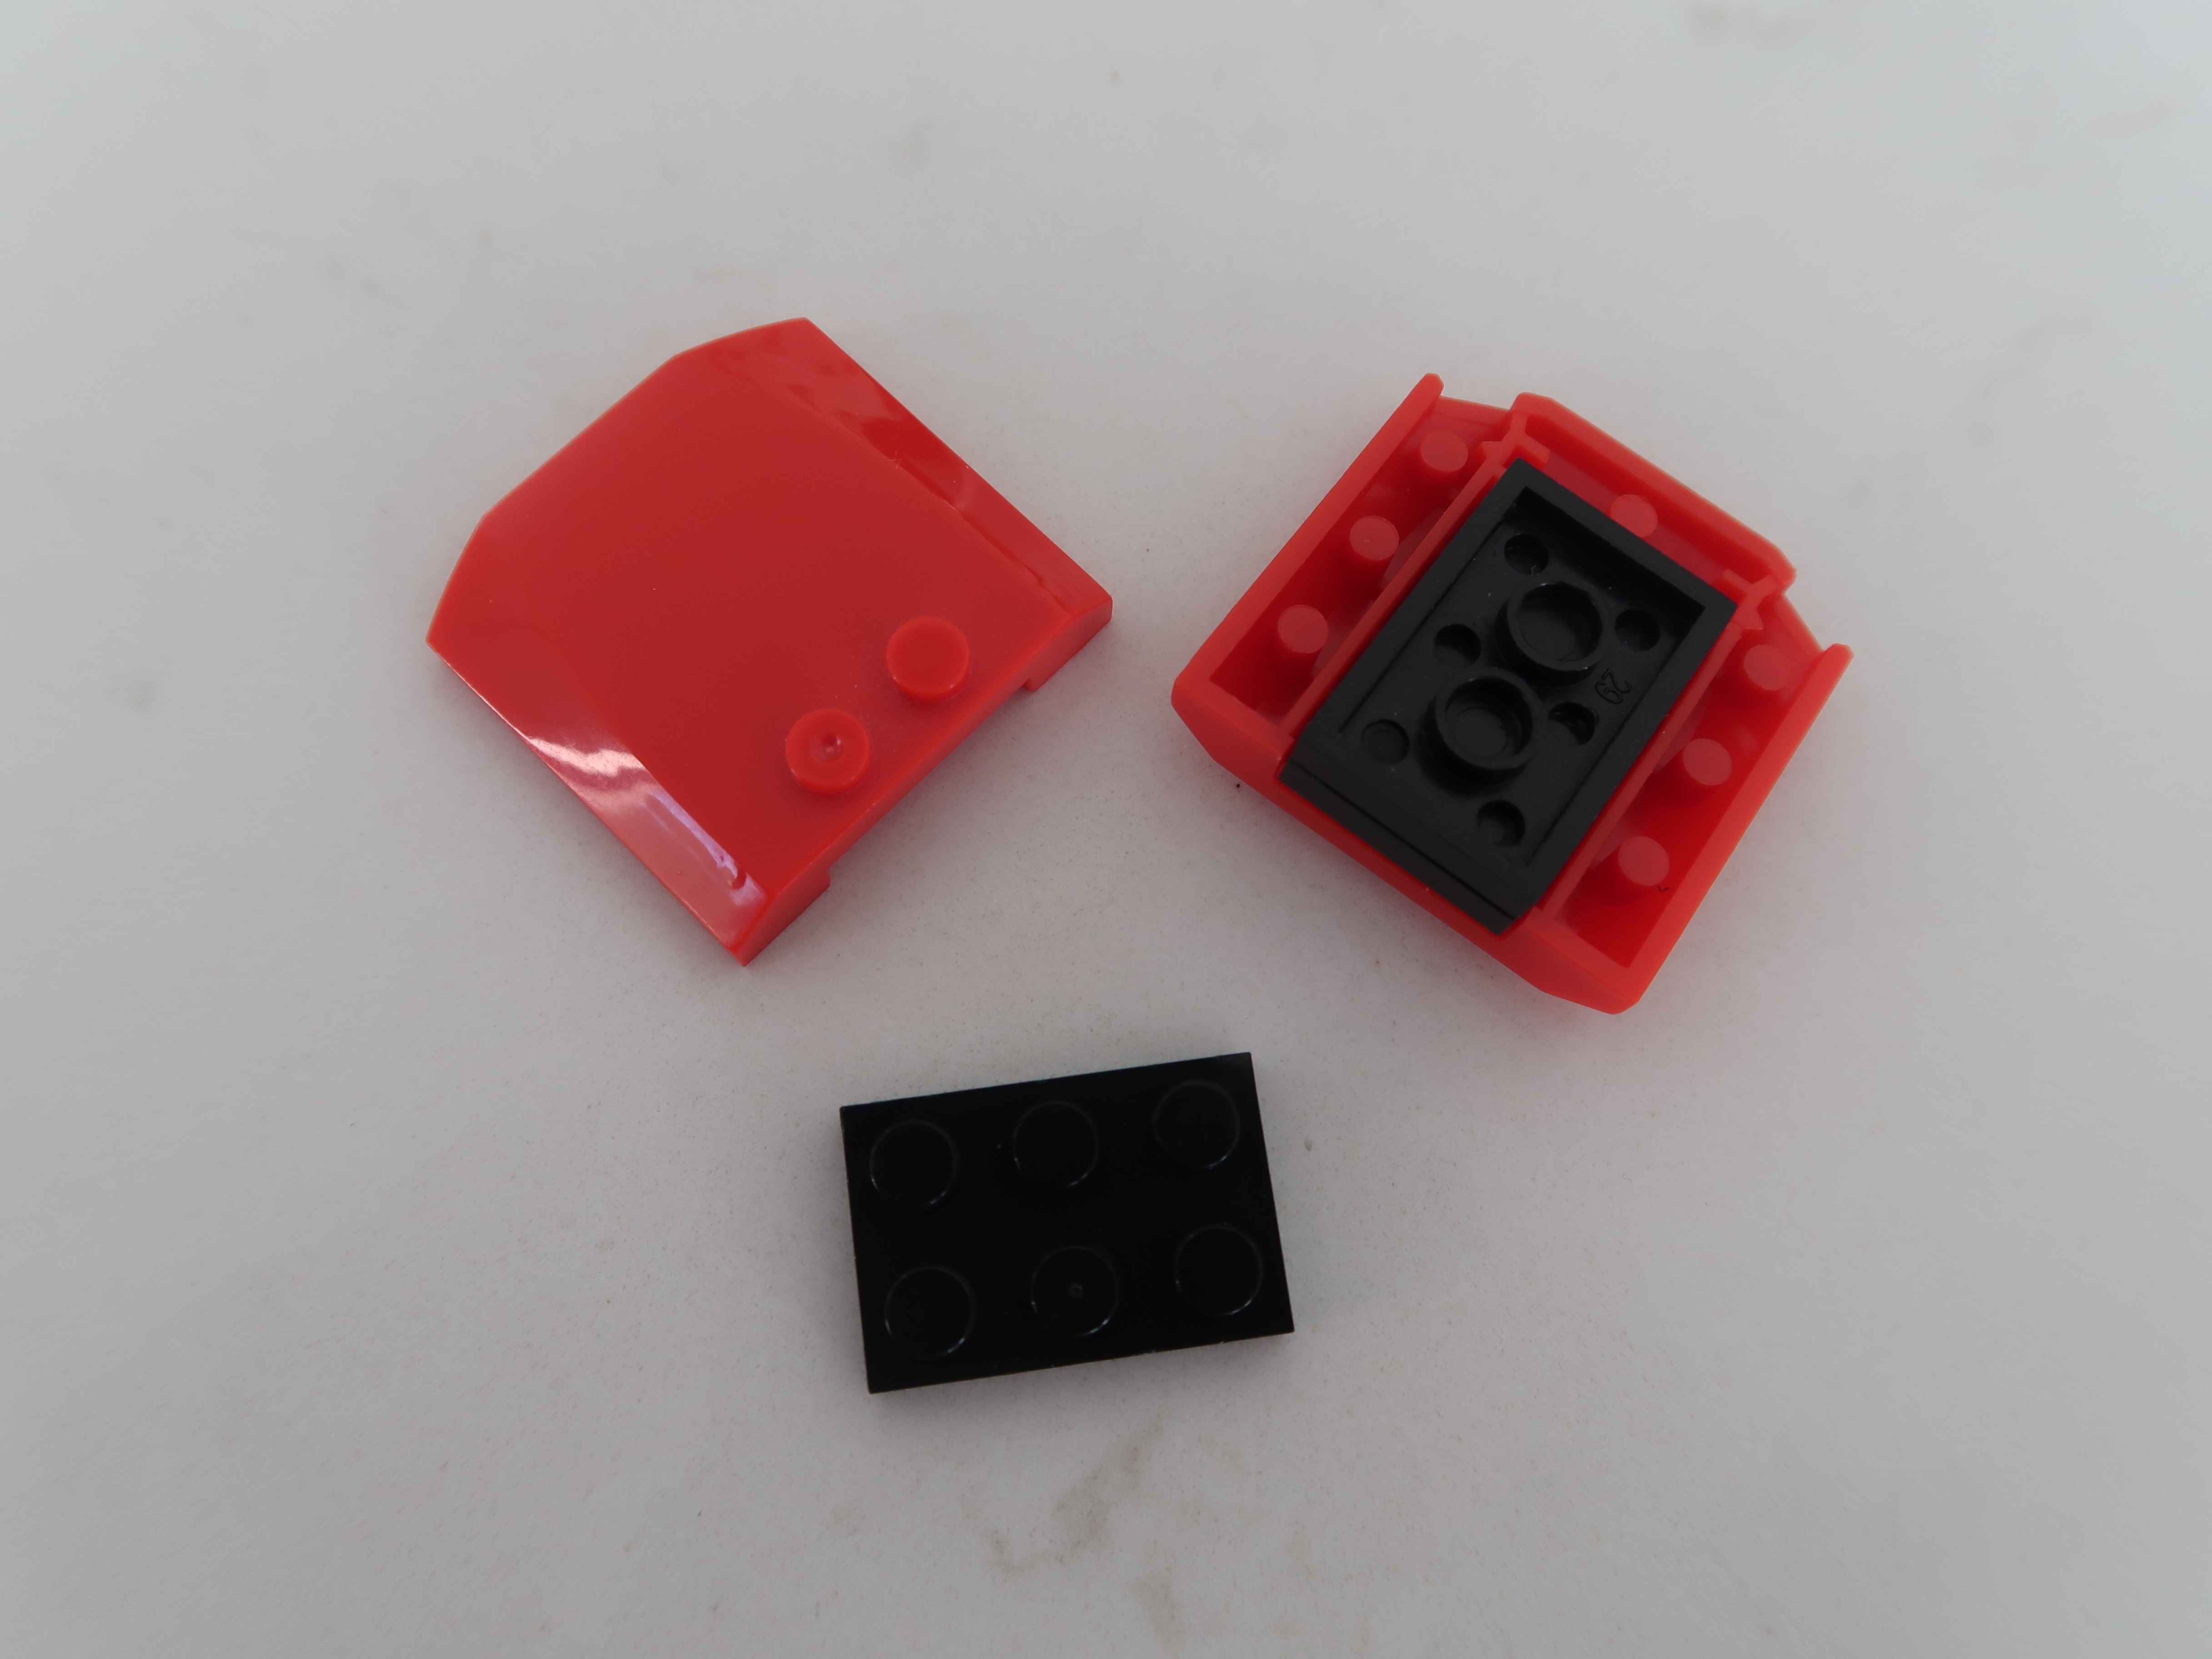
These are the extra pieces you will need if you are so inclined to
securely attach the horns to the head.
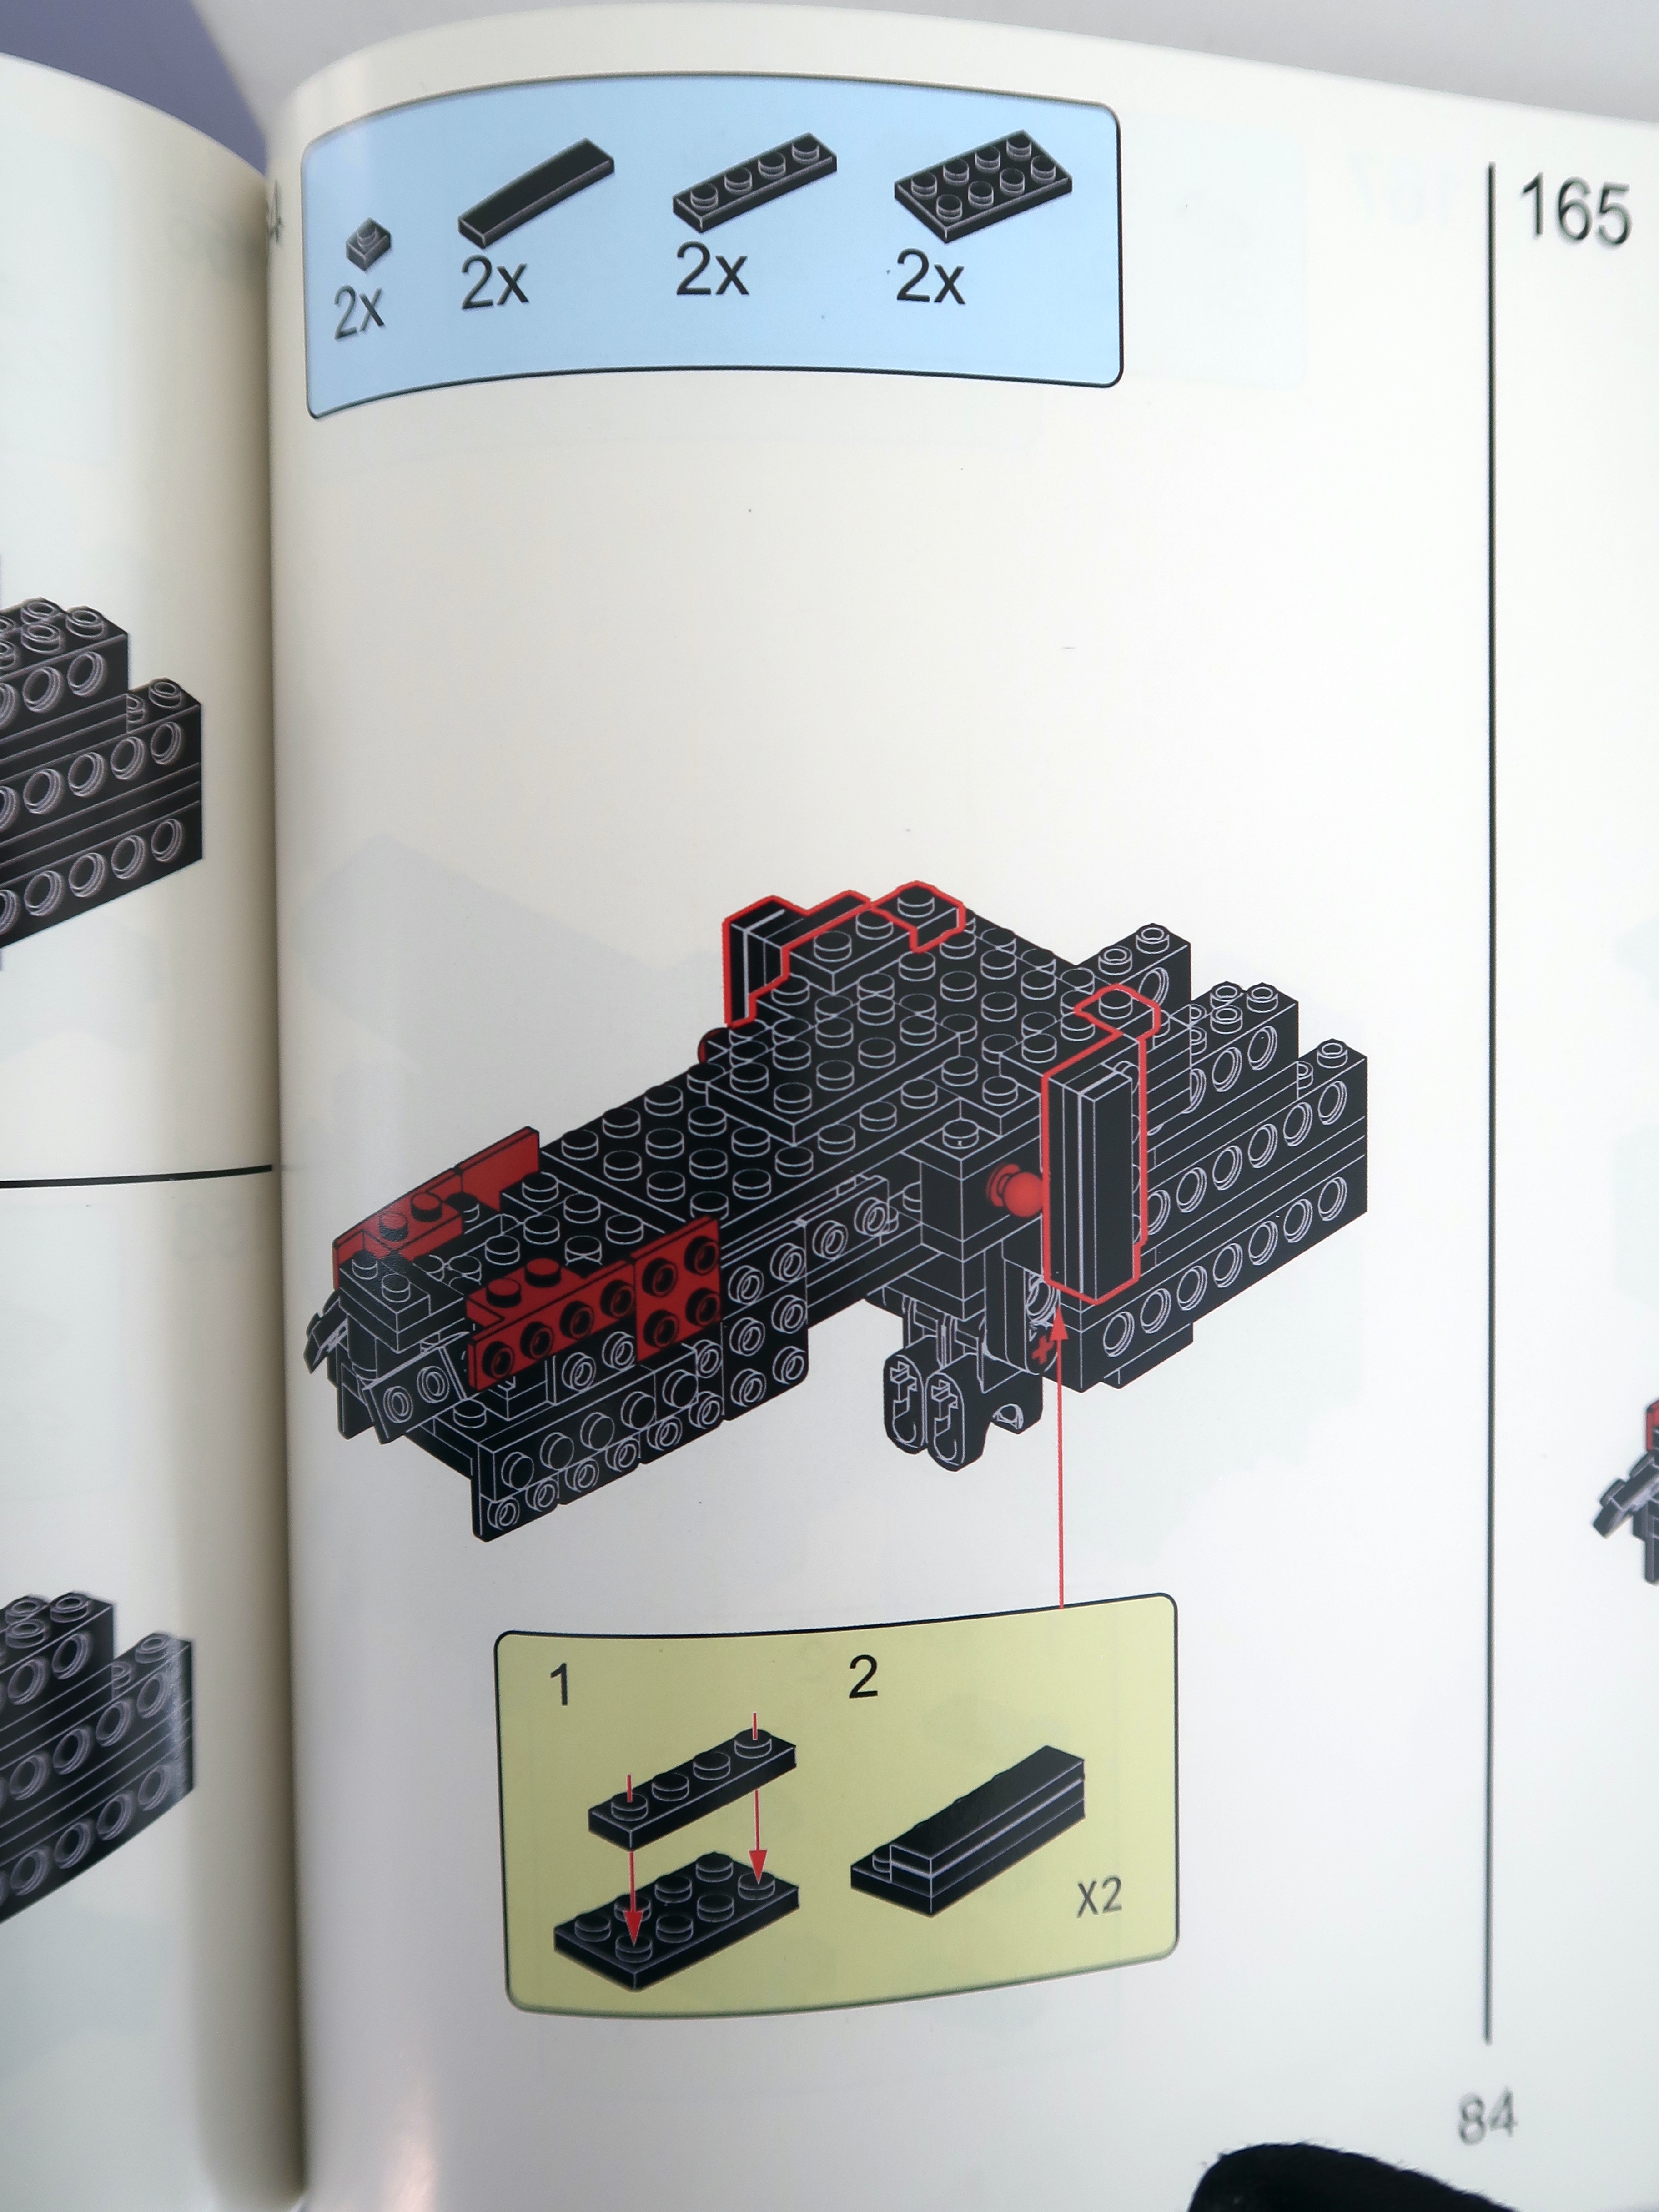
Replace the bricks from step 164 with the bricks in the previous picture.
Picture Gallery
Please use the following pictures for reference if you need.


Final thoughts
The
JMBricklayer Dragon Head
looks very imposing once completed. I think there are some design
challenges that need to be addressed, and it's possible if you have the
extra pieces to make the changes shown above. Some who build this
set may not want to proceed and it's totally understandable. For
others, it's an opportunity to persevere and not be afraid to think
outside the box. This is definitely a set for advanced
builders only.
I hope you found this post helpful, if you are building the
JMBricklayer Dragon Head. Thanks for staying until the end! See you in my next
post, bye!
Save some money by using my code "itsnotlego15%" at the JMBricklayer website (non sale items).
#bricktoyreviews #jmbricklayer