Lego Downtown Diner Modular 6013 from Aliexpress Review
Intro
Hey brick fans, I'm back share pics and my review of the unbranded version of the Lego Downtown Diner 10260 modular building. I bought mine off Aliexpress and received a generic version only identified as 6013. The manual indicates that it has 2480 pieces and is rated for ages 16+.
So let's jump in and take a look at this compatible Lego set and see if it's worth getting or not.
Unboxing
Aliexpress delivered the Downtown Diner clone in the generic white plastic
bag. The 32x32 stud tan baseplate was sandwiched in the instruction
manual, both survived shipping relatively unscathed.
The rest of the 2480 pieces was compressed into several cellophane bags
numbered 1 through 10.
Here's all the parts bags to construct the Downtown Diner. This is
the breakdown of the numbered bags 1 through 10: There are 3 bags of
parts for each respective number , except for 9 and 10 which only have 2 bags
each. In my package, several of the numbered bags were torn
because the cellophane used was a bit flimsy. Prior to building the
Diner, I had some worries about whether some of the pieces fell out or were
missing.
Additionally, this bag was un-numbered and contained various gray plates and a
brick separator.
Regarding the manual, I realize that the instruction booklet is very
different from the Lego Downtown Diner instructions. The
numbering of the steps and the placement of pieces is different too.
For comparison, here is the digital copy of the Lego
instructions:
https://www.lego.com/en-ca/service/buildinginstructions/10260
Build Progression
Here's a very quick run through for each of the 10 sections. I'll
try to highlight any issues if any.
The first floor of the Downtown Diner is an old style 50's restaurant
which will be built up in sections 1 thru 4.
Section 1
Section 1 uses parts from 3 bags and the baseplate to build the sidewalk and
part of the first floor of the Diner.
I will point out that instead of using the provided tan 32x32 baseplate,
I've decided to put the Downtown Diner on a raised baseplate constructed
of random bricks and baseplates from my collection. I find that the
raised baseplate provides greater stability and a solid base for the
modular buildings.
In addition to implementing the raised baseplate, I also have been updating
all of my modular buildings by adding a fascia on the front side just to
give the display a cleaner look. Please note that the techniques
above are not part of the instructions.
In this section we are introduced to the Cook, who is first of six
minifigures included in the Diner set. We will take a closer look at
all of the minifigures later. The Diner features a very retro
black and white tiled floor.

If you compare the picture of my Diner vs. the instructions, you will see that
I've also reversed the sidewalk colour from dark gray to light gray. This
change is to make my Downtown Diner consistent with the sidewalks of my other
modular buildings. You might notice I have also set the modular
foundation back by one extra stud to give extra room on the
sidewalk.
Section 2
We will finish off the interior of the diner and add the back wall in section 2.
So I found this deficiency in the instructions which leaves out the back of one
of the seats. I was hoping that only the instructions were defective, but
the part for the seat back was also missing. If you need to replace it, it
is the 1x4
curved slope brick lego part number 6191/ 10314.
Here is a pic of the actual Lego instructions that show the back of the
seating.
The pictures above show the diner banquette, a coffee maker, and an old time
candy machine.
Section 2 complete!
Added the large range hood, fountain dispensers and the diner counter. In
the instructions you get two glass mugs, and a camera but they don't attach
anywhere. I was missing a 1x1 turquoise piece which is supposed to be
placed near the rear entrance. I used a white piece from my extra parts
since I don't have a lot of turquoise bricks.
This generic set numbered 6013 did not do a good job of packaging the large
window pieces, because mine are all scratched and scuffed up.
If your set has the scratched window pieces, here are the
replacement parts
you want to get.
The newer alt Lego sets don't have this problem anymore, so mine might be old
inventory. Luckily the printed glass door was free of scratches. A
waitress minifigure on roller skates is included in section 3.
Section 4
The first floor restaurant is finished! Everything is nice and sturdy,
even the Diner sign. The wall hangings are printed and reminiscent of
the ones found in the palace cinema modular building.
Section 5
With the first floor finished, it's time to shift our attention to the second
floor, which houses a training gym complete with a boxing ring and barbell for
weight training.
I like the water cooler and the blue weight stand. No that is not two
women fighting in the boxing ring! It's just a dude with a fancy hairdo
scaring the young blonde girl. They are minifigures #3 and #4.
If she's the trainer, why doesn't she get boxing gloves as well?
The second floor is not complete yet, so we need to finish it off in section
6.
Section 6
This section was fairly straightforward to build. The two side windows
are actually installed upside down on purpose which is a building technique
I've not seen before. Fortunately, all of the glass pieces for the
windows were scratch free. A punching bags was added to the
interior, and I must say the rear circular staircase is a unique build as
well.
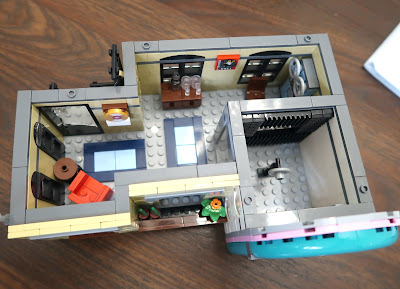
Wrapping up section 6, we can place the second floor on top of the first
floor.
Section 7
The next two sections will construct a recording studio for the third
floor. Talk about vintage, are you old enough to remember a time
when music was recorded onto reels of tape as a physical media ? The
sound quality of the old tape reels was less than optimal.
So far, so good.
Section 8
The building technique to finish the third floor walls is almost identical to
the steps in section6. The main difference is that there is no circular
staircase, just a ladder. Plus there is the addition of the art deco
arch over the glass area at the front.
Minifigure #5 is a mystery woman. Is she the recording studio sound
engineer or is she a vocal artist? It turns out she is identified as a Manager according to the Brickowl website.
Section 9
Building the Diner roof was pretty straightforward. The skylight is
directly over the seating area of the third floor.
Here's the Downtown Diner with the roof attached. It's finally done
and looks great! At some point, I will probably place some gray
tiles on the back portion of the raised baseplate to cover up the purple
colour.
Section 10
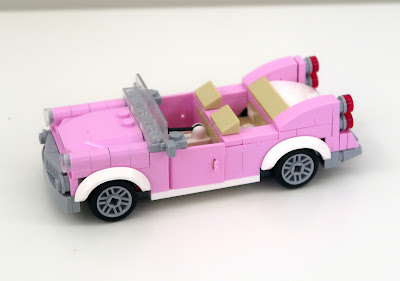
The last step is to build the pink car.
Looks cute and it can even seat three minifigures comfortably. The sixth minifigure you get is a musician with red guitar.

Speaking of minifigures, here's what the alt Lego copies of the six minifigures
look like. I think they look like decent replicas of the original Downtown
Diner minifigures.
Final Thoughts
Although the design of the Downtown Diner is a bit controversial, I think it's
a nice looking modular building and I'm happy to have this Lego clone in my
collection. The building instructions were good even though they
vary somewhat from the Lego instructions in terms of sequence.
Just like the original Lego set, this one has all printed pieces and no stickers. All of the printed pieces were very good.
The
minifigures look great except personally I think I will change the hairpiece
of the boxer. I wish that the set design included an extra boxer
minifigure or a coach for the boxer to spare with. At least give the
blonde bodybuilder some optional boxing gloves.
As for build quality, this unbranded copy of the Lego Downtown Diner still
suffers from scratched window parts like the the old Lepin models. The
single missing 1x1 brick wasn't a huge issue for me, but the missing curved
seat back in the diner was disappointing. And it was actually left out
in the instructions as well. So if you intend to get the alternate
copy of the Lego Downtown Diner, don't get the 6013 version, if you can.
Overall, if you don't look too closely, it's a nice modular building to
get.
Just a reminder that I've changed the set somewhat by adding a raised baseplate and changing the colour of the sidewalk tiles from dark gray to light gray. Future changes I will make include changing the boxers hairpiece and modify the diner counter so that the mugs can be attached to it instead of just being displayed loosely.
Thanks for looking, bye for now!


