Cada C66014W Japanese Canteen Set Review
Greetings, everyone! I'm excited to bring you another review, showcasing a
captivating Japanese-themed set by Cada Blocks! Our spotlight today is on the
Japanese Style Canteen, a standout among the five intricately designed
Japanese-inspired modular buildings within the Cada brand. Let's delve into the
details and explore the unique features that make this set a noteworthy addition
to the collection.

I'd like to express gratitude to
Afobrick.com for
generously providing today's featured set. Afobrick.com brings you 100% LEGO
compatible high quality building sets featuring many fun original designs and
MOC licensed products. Their wide array of options ensures that you'll
find the perfect set to fulfill all your building needs. They offer free
shipping and parts replacement if necessary.
Set Details
* NAME:
The Japanese Style Canteen
* SET #: C66014W
* THEME: Japanese Building Series
* BRICK COUNT: 861 pieces
* MINIFIGURES: 1
* RELEASE DATE: October 2023
* BONUS FEATURE: Led Lighting Included
* Lego Compatible: Yes
It's worth mentioning that the initial trio of Japanese-themed buildings was
skillfully crafted by the master designer Tong Xin Jun, known as
exesandbox
on social media. However, both the
Canteen
and the recently introduced
Cat Grocery Shop
deviate from his design. These two structures carry a distinct vibe, offering
a unique aesthetic. Feel free to evaluate and determine which set of buildings
aligns more with your preferences.
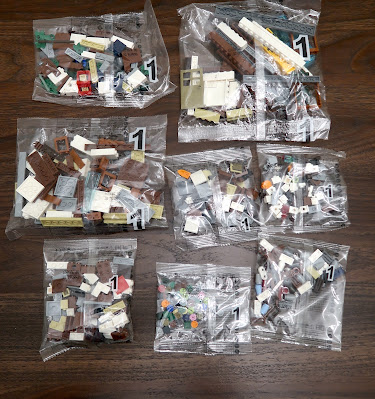
Unpacking the Set
The set comes complete with a top-notch 86-page instruction manual,
meticulously divided into two steps, each matched with numbered bags of
parts for convenience. Additionally, the package includes a gray 16x16
baseplate, a minifigure, a USB-powered LED light strip, and a pair of
flexible tubes. To add a personalized touch, there's also a sticker sheet
featuring 28 stickers.

Although I'm grateful for the bonus minifigure, I must admit that the hairpiece
gives off a rather unfortunate impression, resembling a poorly styled toupee. In
terms of size, the canteen owner appears comparable to a Lego minifigure, yet
there's a distinction in their internal structure. Notably, the Cada minifigure
showcases increased flexibility, allowing for side-to-side tilting of the head,
setting it apart from the traditional Lego counterpart.
First Step - First Floor
The following series of images documents the step-by-step construction of
the initial floor of the Japanese canteen. I incorporated the LED lighting into
the build, although I must confess, it was done with a bit of a hasty touch.
Although it's labeled as a canteen, I believe its intent is more in line
with a quaint mom-and-pop sushi shop. I envision the corner counter as the
hub for crafting and serving sushi. However, there seems to be an issue
with the sizing of both the counter and stools. Personally, I question the
inclusion of stools; they could have simply opted for a standing sushi
counter.
Some nice detailing on the backside of the building. The red box is
supposed to be a fire hydrant?
Displayed on this section of the structure is a flagpole designed to
hold two koi fish banners. Upon reflection, I opted not to use them as I
felt they occupied excessive space and were somewhat distracting.
The second floor will be directly affixed to the first floor, as we'll
observe later. This implies that in the initial design, the intention is
for the two floors not to be separated.
In my opinion, this front perspective is pivotal to capturing the
essence of the Japanese-themed shop. Numerous delightful details, such
as the detailed windows, stone lanterns, and the entrance adorned with
curtains (known as noren), contribute to its distinct charm. While I
typically avoid using many stickers in my building block sets, this
particular one seems to benefit from them for a more authentic feel. I
plan to apply them later on.
Step 2, the Second floor
The turret is, in fact, an integral component of the first floor. It
connects to the building's side and unfolds to reveal a counter and
stool of more standard proportions within.
The upper level of the canteen encompasses a compact room
featuring tatami mat flooring, a chair, a table, and a TV. While windows
adorn each wall, a conventional door is notably absent.
Just a bit on the tight side and there's no stairs to get to the second
floor.

Climate control is via an externally mounted AC unit or you can simply
open the windows for some fresh air.
A less common sight in modular building sets is a washing machine, but
this one is situated on the veranda of the second floor. With no dryer in
sight, clothes are hung on the clothesline for drying.
While the set's initial design doesn't permit separating the second
floor from the first, it does allow for the removal of the rooftop.
Lighting the Canteen
The set includes an LED light strip with a USB plug attached. To activate
the lighting, you'll have to supply your own power source. In the image
above, I'm using a Funwhole battery pack equipped with two AA batteries.
You can attach the LED wire to the clips inside the shop and then feed it
into the second floor.
The lighting makes a nice mood effect.
Pro Tip: Make sure you test your lighting before you put it inside the
building.
Review Summary and Final Thoughts
There are a few drawbacks to the Japanese Canteen that I want to highlight.
First and foremost is the downspout on the building's side, which is poorly
designed and consistently comes apart when attempting to handle the
structure.

The original design features two bends, as evident in the picture on the
left. Unfortunately, this often results in the cylindrical bricks losing
their connection when the structure is handled. To address this issue, I
opted to run the downspout straight down the wall instead of having it
curved. This simple adjustment resolved the problem by excluding some of
the downspout pieces.
Additionally, as previously mentioned, the second floor is intended to
be firmly attached to the first floor. Consequently, separating them
proves challenging if you wish to conveniently access the first floor
interior, for tasks such as adjusting the lighting or capturing photos
with the minifigure.
If you happen to have extra 1x4 or 1x6 smooth tiles, place them on top of
the plates, as depicted above. The image on the left shows the setup
before, and the one on the right illustrates the after. This modification
allows for the effortless removal of the second floor from the first.
Despite the mentioned shortcomings, I find the Japanese Canteen to be an
aesthetically pleasing building block set. It encapsulates the essential
elements of a Japanese-themed structure, and I believe it will complement
the other Japanese buildings in my collection quite well.
While the main attraction for me is the front of the building, the rear of
the shop is equally appealing. From this angle, it could easily double as
the facade of a Japanese house if desired.
There's significant potential for extensive customization with this shop,
should one choose to explore it. Personally, I'm considering integrating
this model onto a 16x32 raised baseplate, a practice I've applied to my
other Japanese-style buildings, both Cada and non-Cada. Additionally, I'm
contemplating adding a staircase to the building and potentially
increasing the height of the second floor by two rows of bricks.
Recommendation
I'm going to give this set a biased 4.5 out of 5, just because I'm a huge fan of these Japanese themed sets. Marks deducted for the deficient eavestrough and non separable second floor.
Let me know if you think this model fits in with the other Cada
Japanese style buildings. Pictured next to the Canteen is the Cada
Japanese Tea Shop. And here's my reviews of the other Cada
Japanese themed buildings:
Please don't forget to check out all of
Afobrick's building block sets
and the great deals you can get. Feel free to use my discount
code
itsnotlego to save an extra 5% off your purchases.
Bye for now!
#afobrick #cada