JMBricklayer 70109 Space Astronaut Review
I'm going to build it today and let you know about one major improvement, besides the gold and silver plating, that makes the 70109 set superior to the 70102 set. In case you missed it, here's my review of the JMBricklayer 70102 Astronaut set.
Ok, let's get into it!
One of the great things about JMBricklayer is that they ship you the set in
a nice box, unlike some of the other online brick vendors that just ship the
brick sets in a generic plastic bag. From the box art you can get an
idea of how the set looks before you build it. Here are some details
about this set:
Brand:
JMBricklayer
Theme: Sci-fi
Piece Count: 900 pieces
Numbered bags: Yes
Minifigures: No
Stickers or printed pieces: Lots of printed pieces
Missing pieces: No
Extra pieces: A few
Age Rating: 14+
Here are the contents of the Space Astronaut Set.
I counted a total of 19 bags, and there are four sets of bags that are
numbered 1 thru 4 which pertain to the sections in the provided instruction
booklet. The instruction manual has clear and easy to understand
instructions. Also included is a brick separator which I never had to
use.
There are several bags of gold and silver plated bags which makes this set
particularly eye catching.
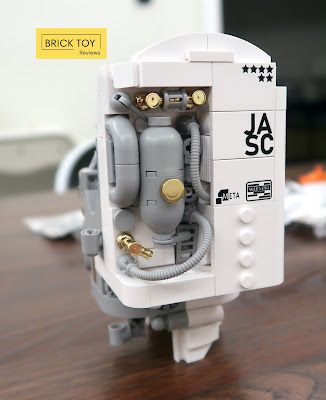
And check out all of these printed pieces that will adorn the spacesuit.
As I mentioned earlier, there are four major steps in the instruction manual
and you can find the bags pertaining to each step by separating them by
number.
Step 1: builds the torso and backpack
Step 2: builds the legs
Step 3: builds the arms
Step 4: builds the helmet and the display stand
The steps for this astronaut set 70109 is almost identical to the set 70102,
except when it comes to the helmet, which we will see later. As you
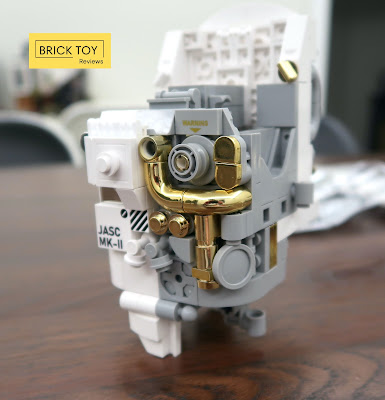
can see from the pics above the gold pieces really pop against the light
gray and white parts.
With the torso completed, we move on to bag number two to build the
legs. There is a small range of movement at both the ankle and knee
joints to allow for posing.
The legs are easily attached to the torso by ball joint connectors and they
hold up very well. The brick clutch is excellent and the finish of the
bricks is top notch too.
Now we can move on to the third section of the build which is the arms.
There is a lot of motion in the arms since they are hinged at the elbows and
wrist. The hands can rotate and even the fingers can be posed.
The arms are attached to the body using the same sort of ball joint
connectors used by the legs. As you can see the arms hold up well and
don't flop down due to the weight. We really get a sense of the part
spacesuit, part mechanical robot composition of this astronaut.
Here's the right side view.
And here's the left side view.
The final bag of parts will build the helmet and the display stand.
Where 70102 had a silver plated helmet visor, set 70109 has a gold plated
visor.
Here's the display stand to which you can attach the space mecha
astronaut. Although you really don't need it because the astronaut
stands very well on it's own as you can see in my previous pictures.
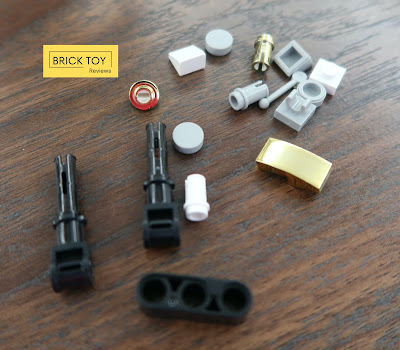
With the build finished, I had a handful of extra parts leftover.
In case you were wondering on how the 70109 Space Astronaut compares to the
70102 Astronaut, here they are side by side. There are some difference
in the printed pieces used between the two sets. Which one do you
prefer?
Ok, here is the major difference in the two sets that is structural and not
cosmetic. I've removed both of the helmets from the astronauts so you
can see the construction inside. The helmet on the left side is
the 70102 set vs. the helmet on the right side which is the 70109
model.
As you can see the newer set gets a brick frame that provides a stronger
foundational element to the helmet. It not only strengthens the helmet
but makes it easier to handle. The older 70102 helmet is far more
delicate and will sometimes fall apart if not handled correctly. This
one feature makes the 70109 set much better than the 70102 set. They
both display well, but in terms of structural design, I prefer the newer
70109 astronaut.
I also prefer the gold and silver plated accents of the 70109 set over the
blue and orange bits of the older set, but that is just my personal
preference.
All in all, the
JMBricklayer 70109 Space Astronaut
makes a great building set and display piece. Clutch and finish were
excellent too. I would rate this set for anyone from novice to expert
and give it a perfect 5 out of 5 rating. Highly recommended!
This just in! Did you know that JMBricklayer now does custom printing of tiled parts? Here are a few samples that they sent me of some designs I found on the internet and they printed them off for me. The prints are crisp and the colours are bright.
The custom printed parts are a feature which you can only order from the
JMBricklayer website. Here is the
link to it and how it works. I definitely plan on using the JMBricklayer service in future
to make custom signs for my modular building store fronts and
interiors.
Please check
them
out if you get a chance, and don't forget to use my code
itsnotlego15% to save some extra
money!
#bricktoyreviews #jmbricklayer


